Mom’s Sawdust Pie
serves 8-10This was the pie my mom made most growing up—and she’s a Southern baker, so that’s saying something.
It was requested for every birthday, holiday, you name it. It’s pure comfort, and shockingly easy to make. The filling is just a handful of ingredients: graham cracker crumbs, toasted pecans, sweetened coconut, egg whites, sugar, and salt.
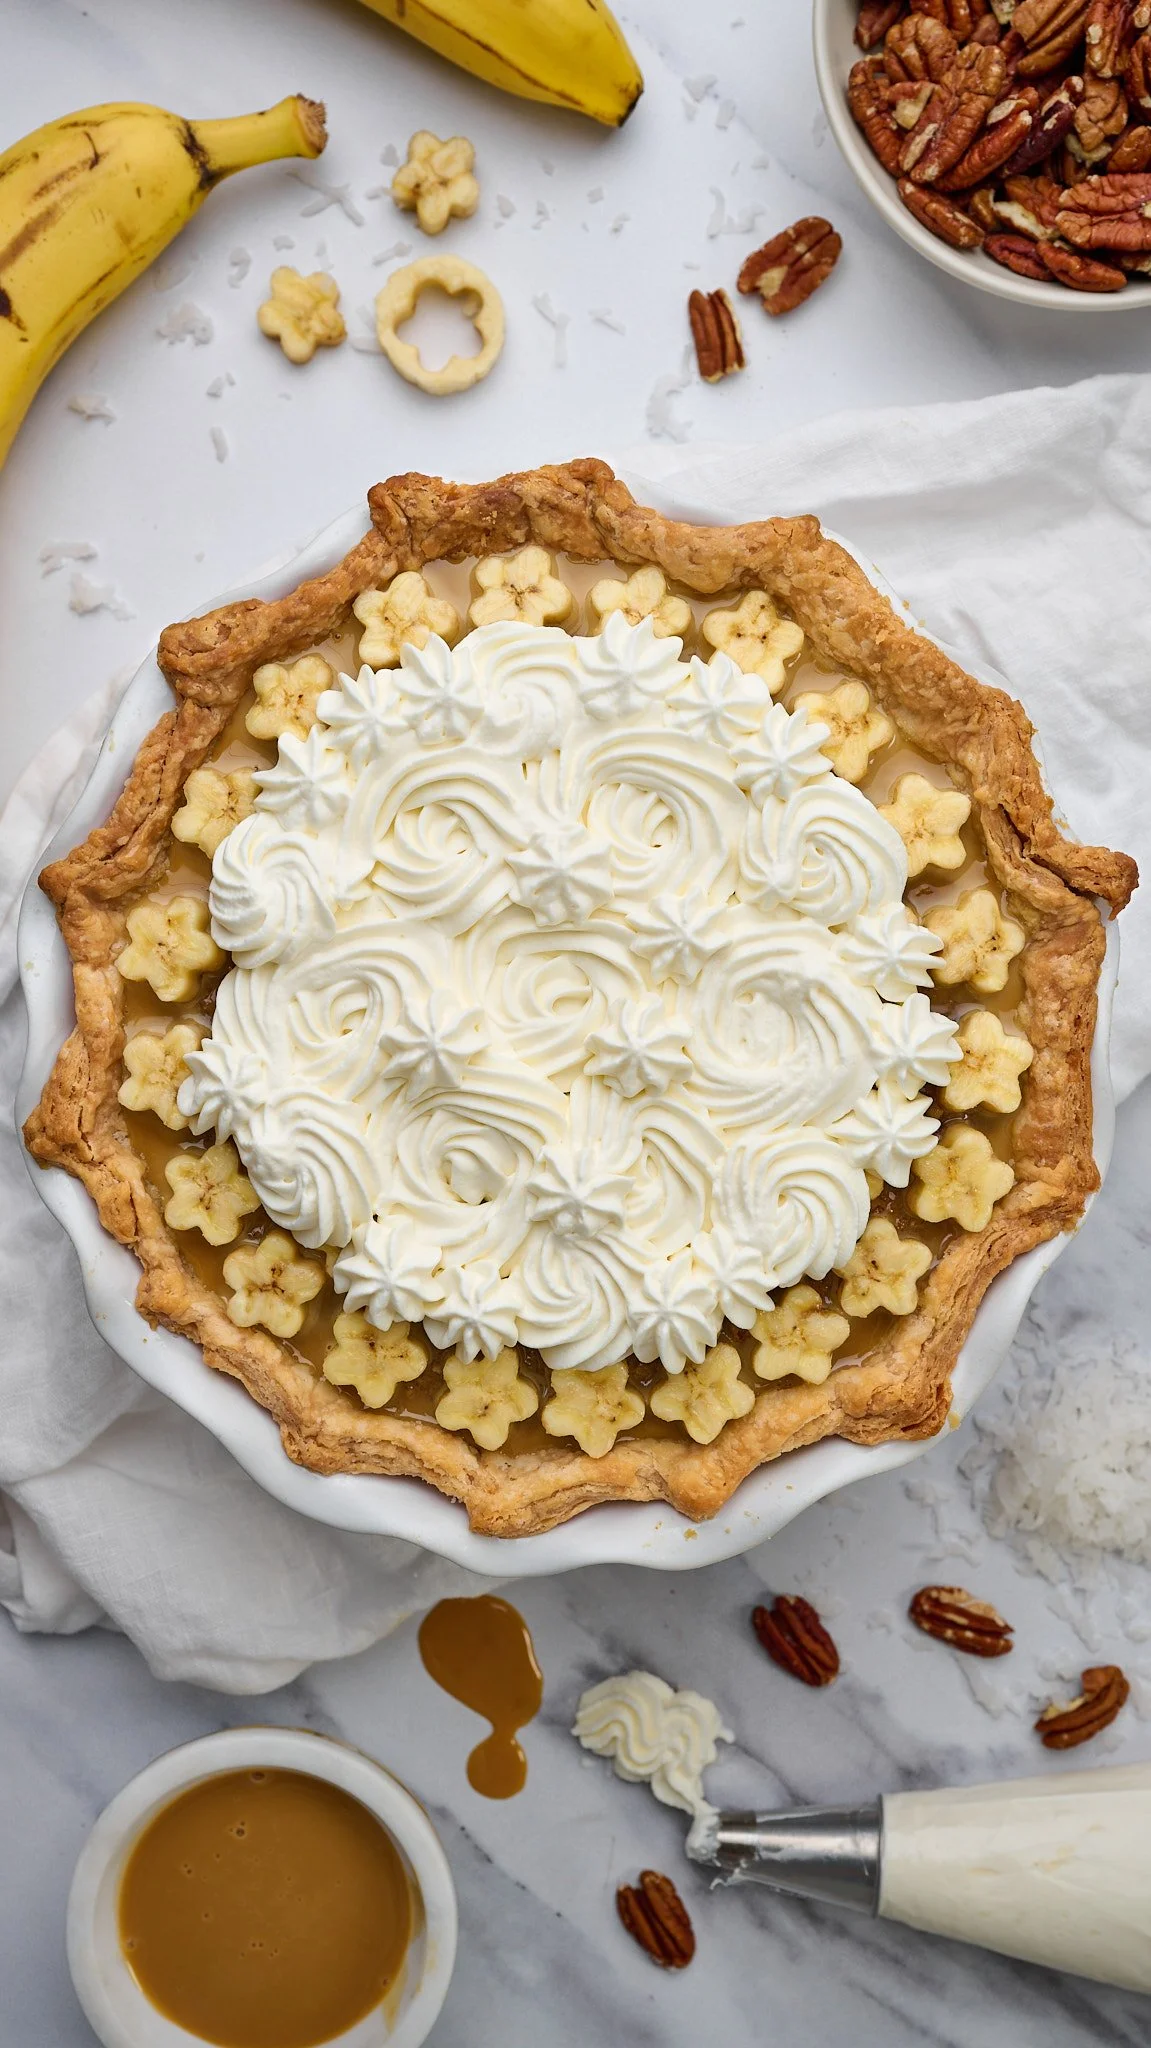
Sounds like a strange combo, but it bakes into a rich, gooey filling that tastes like a cross between pecan pie and a coconut macaroon. The fresh banana and whipped cream topping are non-negotiable. Dulce de leche is optional—but my mom sometimes added it, and it pairs beautifully with the other flavors.
Serve it room temperature, or our favorite way: cold, straight from the fridge.
WHAT YOU’LL NEED
-
![Oxo good grips everyday spatula on amazon best silicone spatula best rubber spatula for cooking]()
Spatula
-
![stainless steel mixing bowls baking bowls metal bowls nesting bowls]()
Mixing Bowls


INGREDIENTS
Pie Crust
1 unbaked 9-inch pie crust (frozen is fine, or see notes for homemade)
Pie weights or dried beans (for blind baking)
Filling
1 ¼ cups sweetened coconut flakes (130 g)
1 ¼ cups chopped pecans, toasted (150 g)
1 ¼ cups graham cracker crumbs (150 g)
1 cup granulated sugar (210 g)
¾ tsp Diamond Crystal kosher salt (or ½ tsp Morton kosher salt)
¾ tsp vanilla extract
1 cup egg whites, from carton is fine (225 g)
Topping
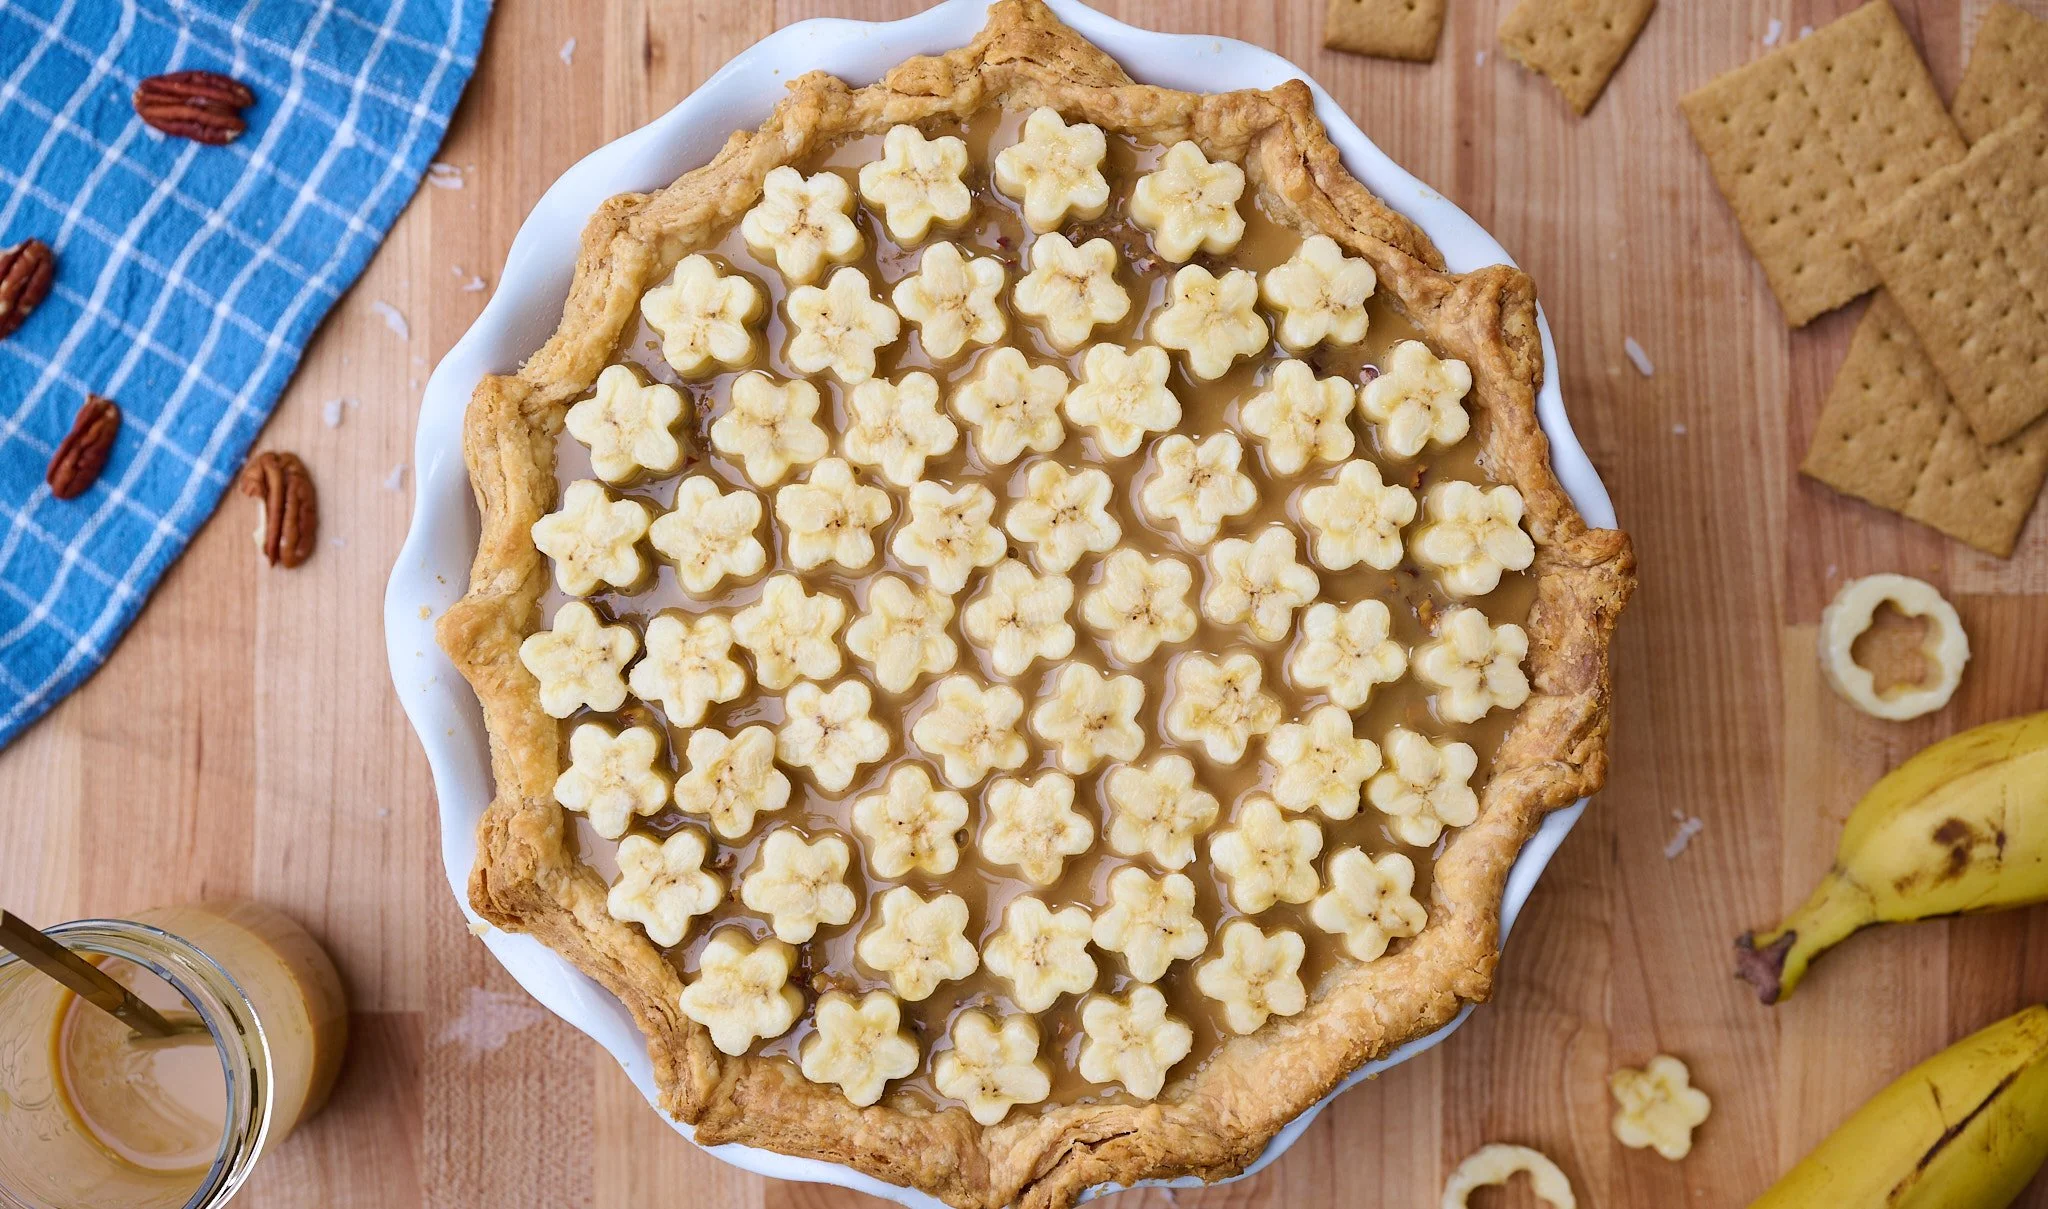
2-3 ripe bananas, sliced into coins
1 cup heavy cream
1-2 tbsp powdered sugar
½ tsp vanilla extract
Optional: dulce de leche (store-bought or simmer 14 oz can sweetened condensed milk—see notes for instructions)
DIRECTIONS
Note: If making homemade dulce de leche, start that first—it takes 2 ½ to 3 hours of simmering time.
Blind Bake the Crust
Preheat oven to 375°F (190°C). Line crust with parchment and fill with pie weights.
Bake for 12-15 minutes, until the edges are set and lightly golden. If using a homemade crust, especially a thicker one, you may need an extra 5 minutes for the edges to fully set.
Remove weights and parchment; bake 5–7 minutes more, until bottom is dry and pale golden. Let cool slightly.
Make the Filling & Bake
Reduce oven temperature to 350°F (175°C).
In a large bowl, mix coconut, pecans, graham crumbs, sugar, salt, and vanilla.
Add egg whites and stir until fully combined. Pour filling into the blind-baked crust and smooth the top.
Bake for 35–45 minutes, until the top is golden brown and the center is just set.
Cool to room temperature, then chill for at least 2 hours for the cleanest slices.
Make the Whipped Cream & Serve
Using a stand mixer or electric hand mixer, whip the heavy cream with powdered sugar and vanilla until medium-stiff peaks form.
Spread a thin layer of dulce de leche over the chilled pie, if using. Top with banana slices and whipped cream (to pipe the whipped cream as shown, use a medium closed star tip).
RECIPE NOTES & TIPS
The pie (without toppings) can be made 1–2 days ahead and stored in the fridge. Add the bananas and whipped cream just before serving.
Use sweetened shredded coconut—not unsweetened. I tested a few versions with unsweetened, and the pie turned out dry every time. After checking with my mom, I realized her original always used sweetened coconut flakes like these. They’re softer, sweeter, and don’t soak up as much liquid, which helps keep the filling gooey and balanced.
Why blind bake? Most Sawdust Pie recipes skip this step, but after a couple rounds of testing, I found it essential for the bottom crust to set properly. It prevents sogginess and gives the pie structure, especially with a gooey filling.
For homemade pie crust: I used Zoë Bakes’ All-Butter & Shortening Pie Crust and halved it for a single crust. It’s sturdy, flaky, and my go-to for pies that need to hold up to gooey fillings. You can make it in a food processor or with a pastry cutter.
To make homemade dulce de leche: Simmer an unopened 14 oz can of sweetened condensed milk (label removed) in a pot of water for 2½ to 3 hours, making sure the can stays fully submerged at all times. Add water as needed, and let the can cool completely before opening. Store in an airtight container in the fridge for up to 2 weeks.
Unnecessary but very fun, you can cut the banana slices into flowers like I did in the photo. I’ve linked the exact cookie cutter I used here.