Peanut Butter Caramel & Chocolate Tart
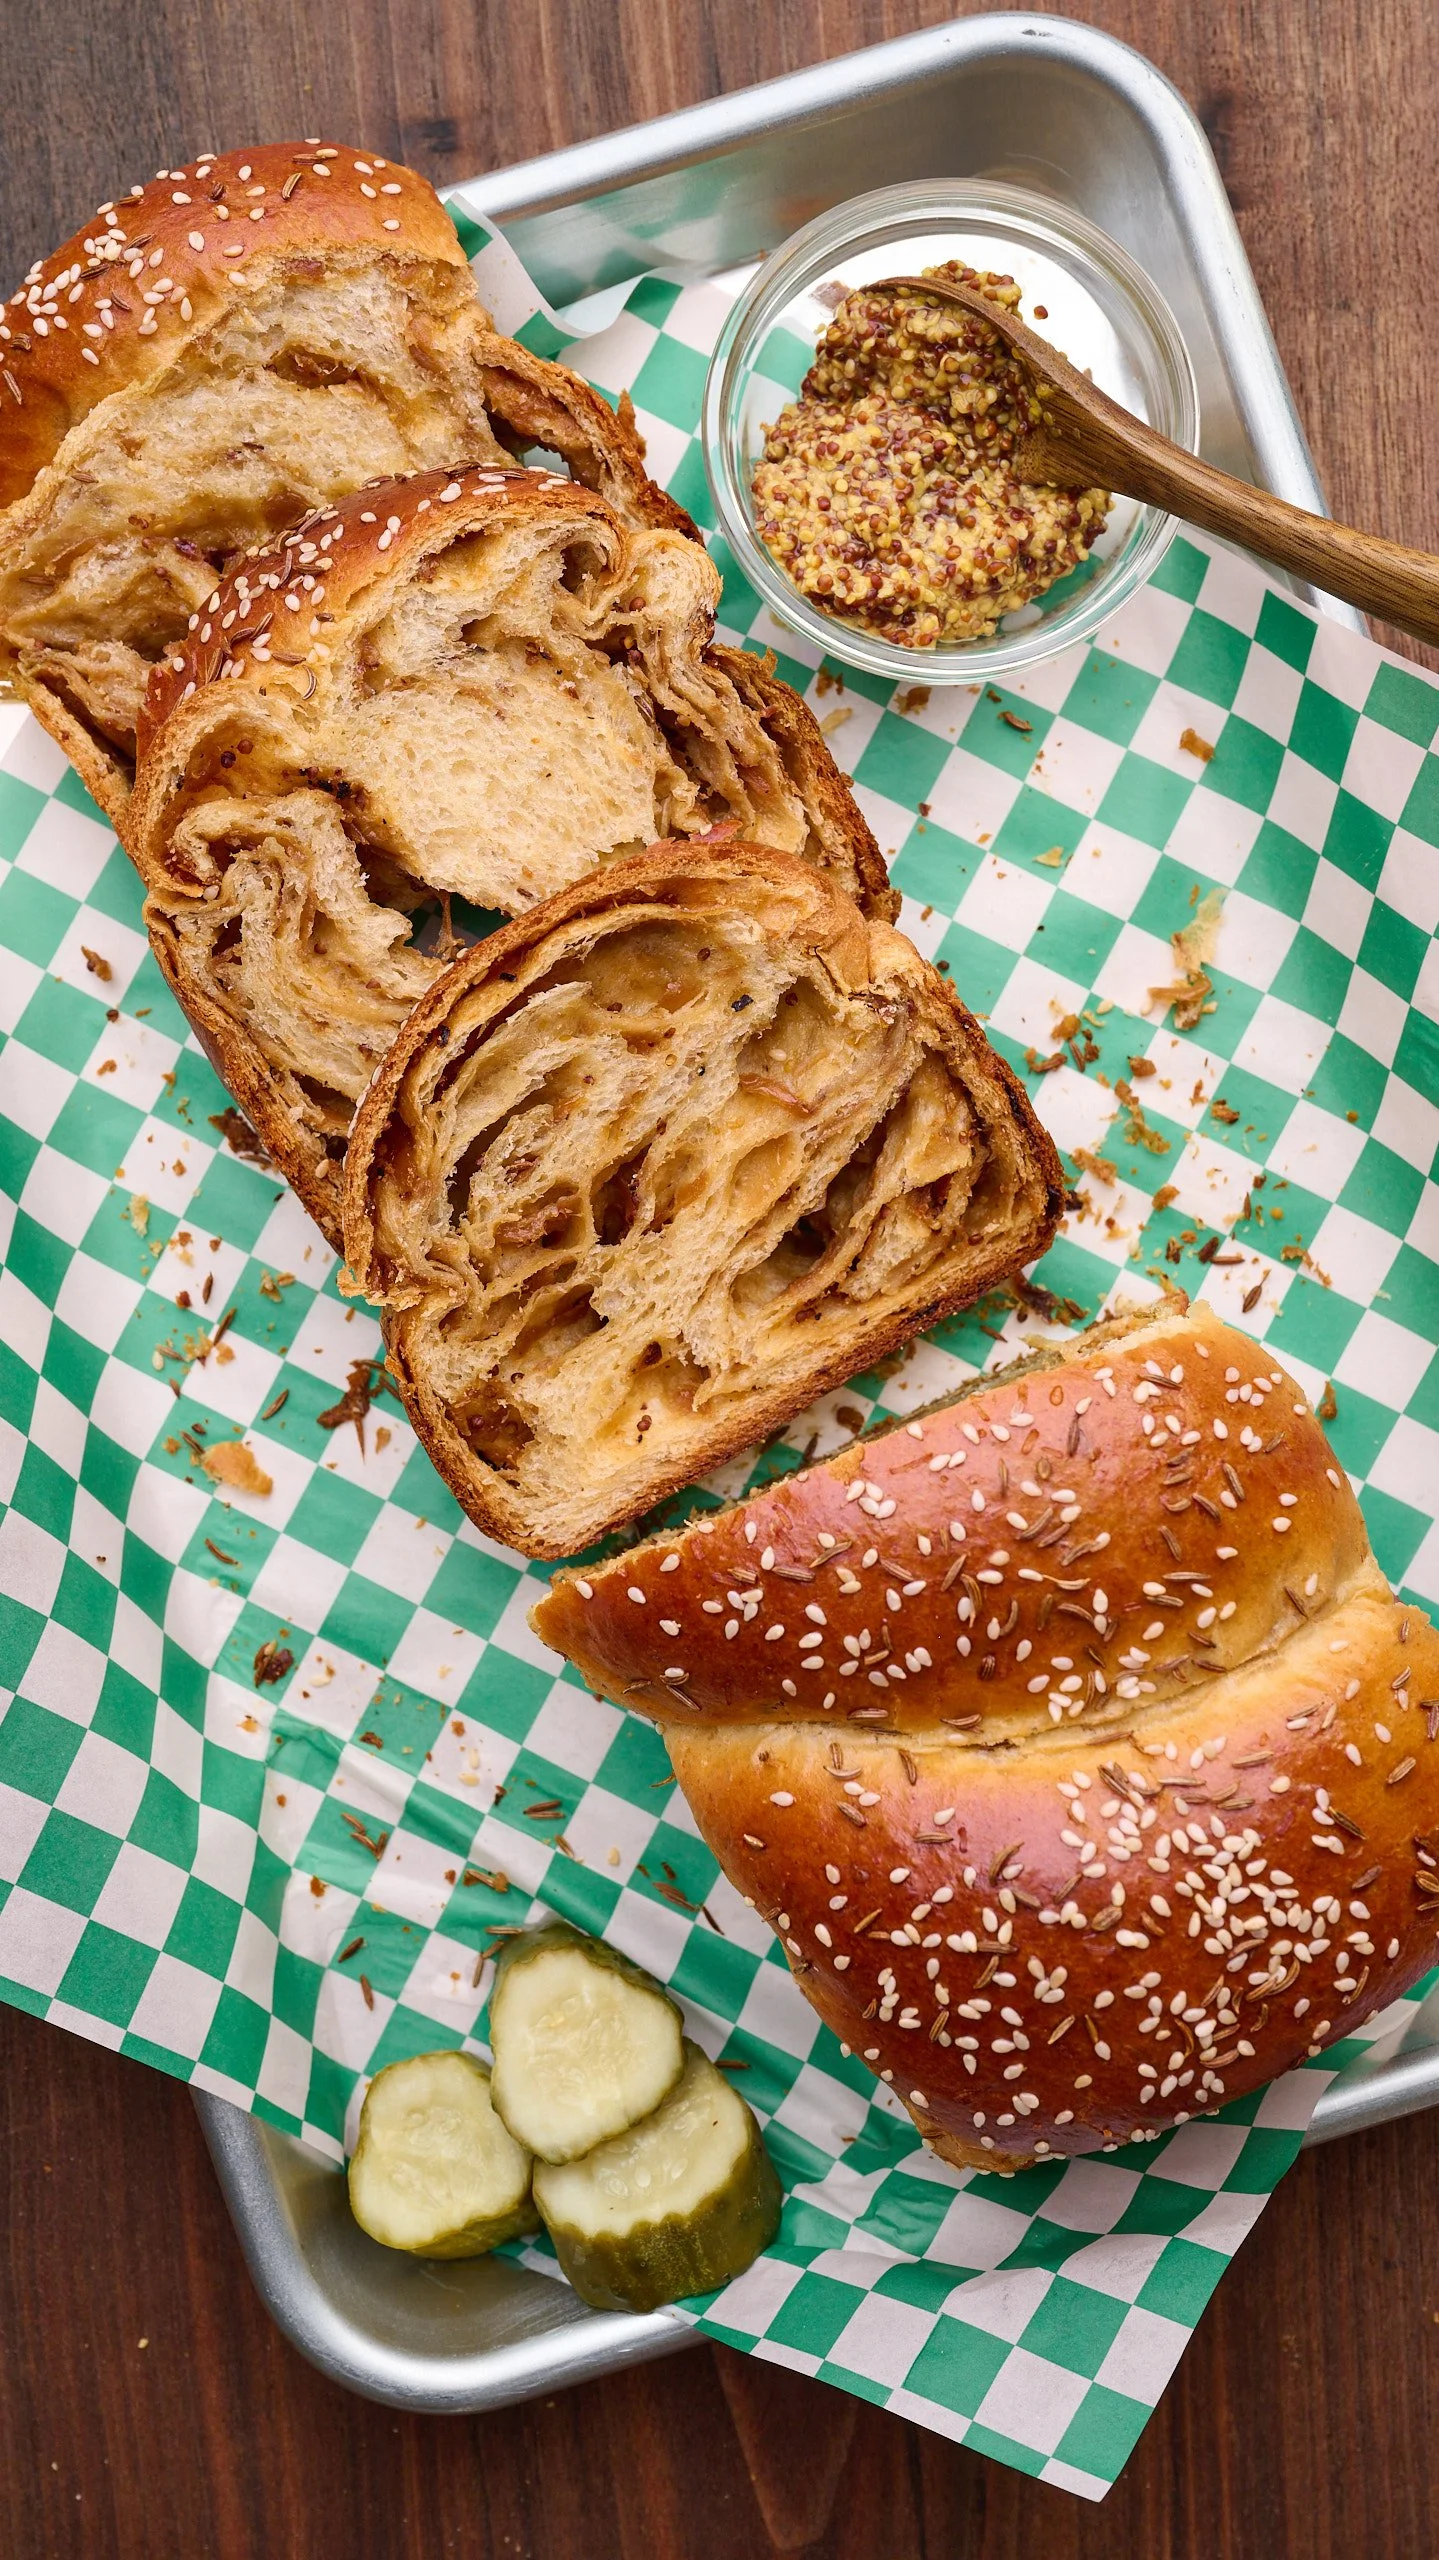
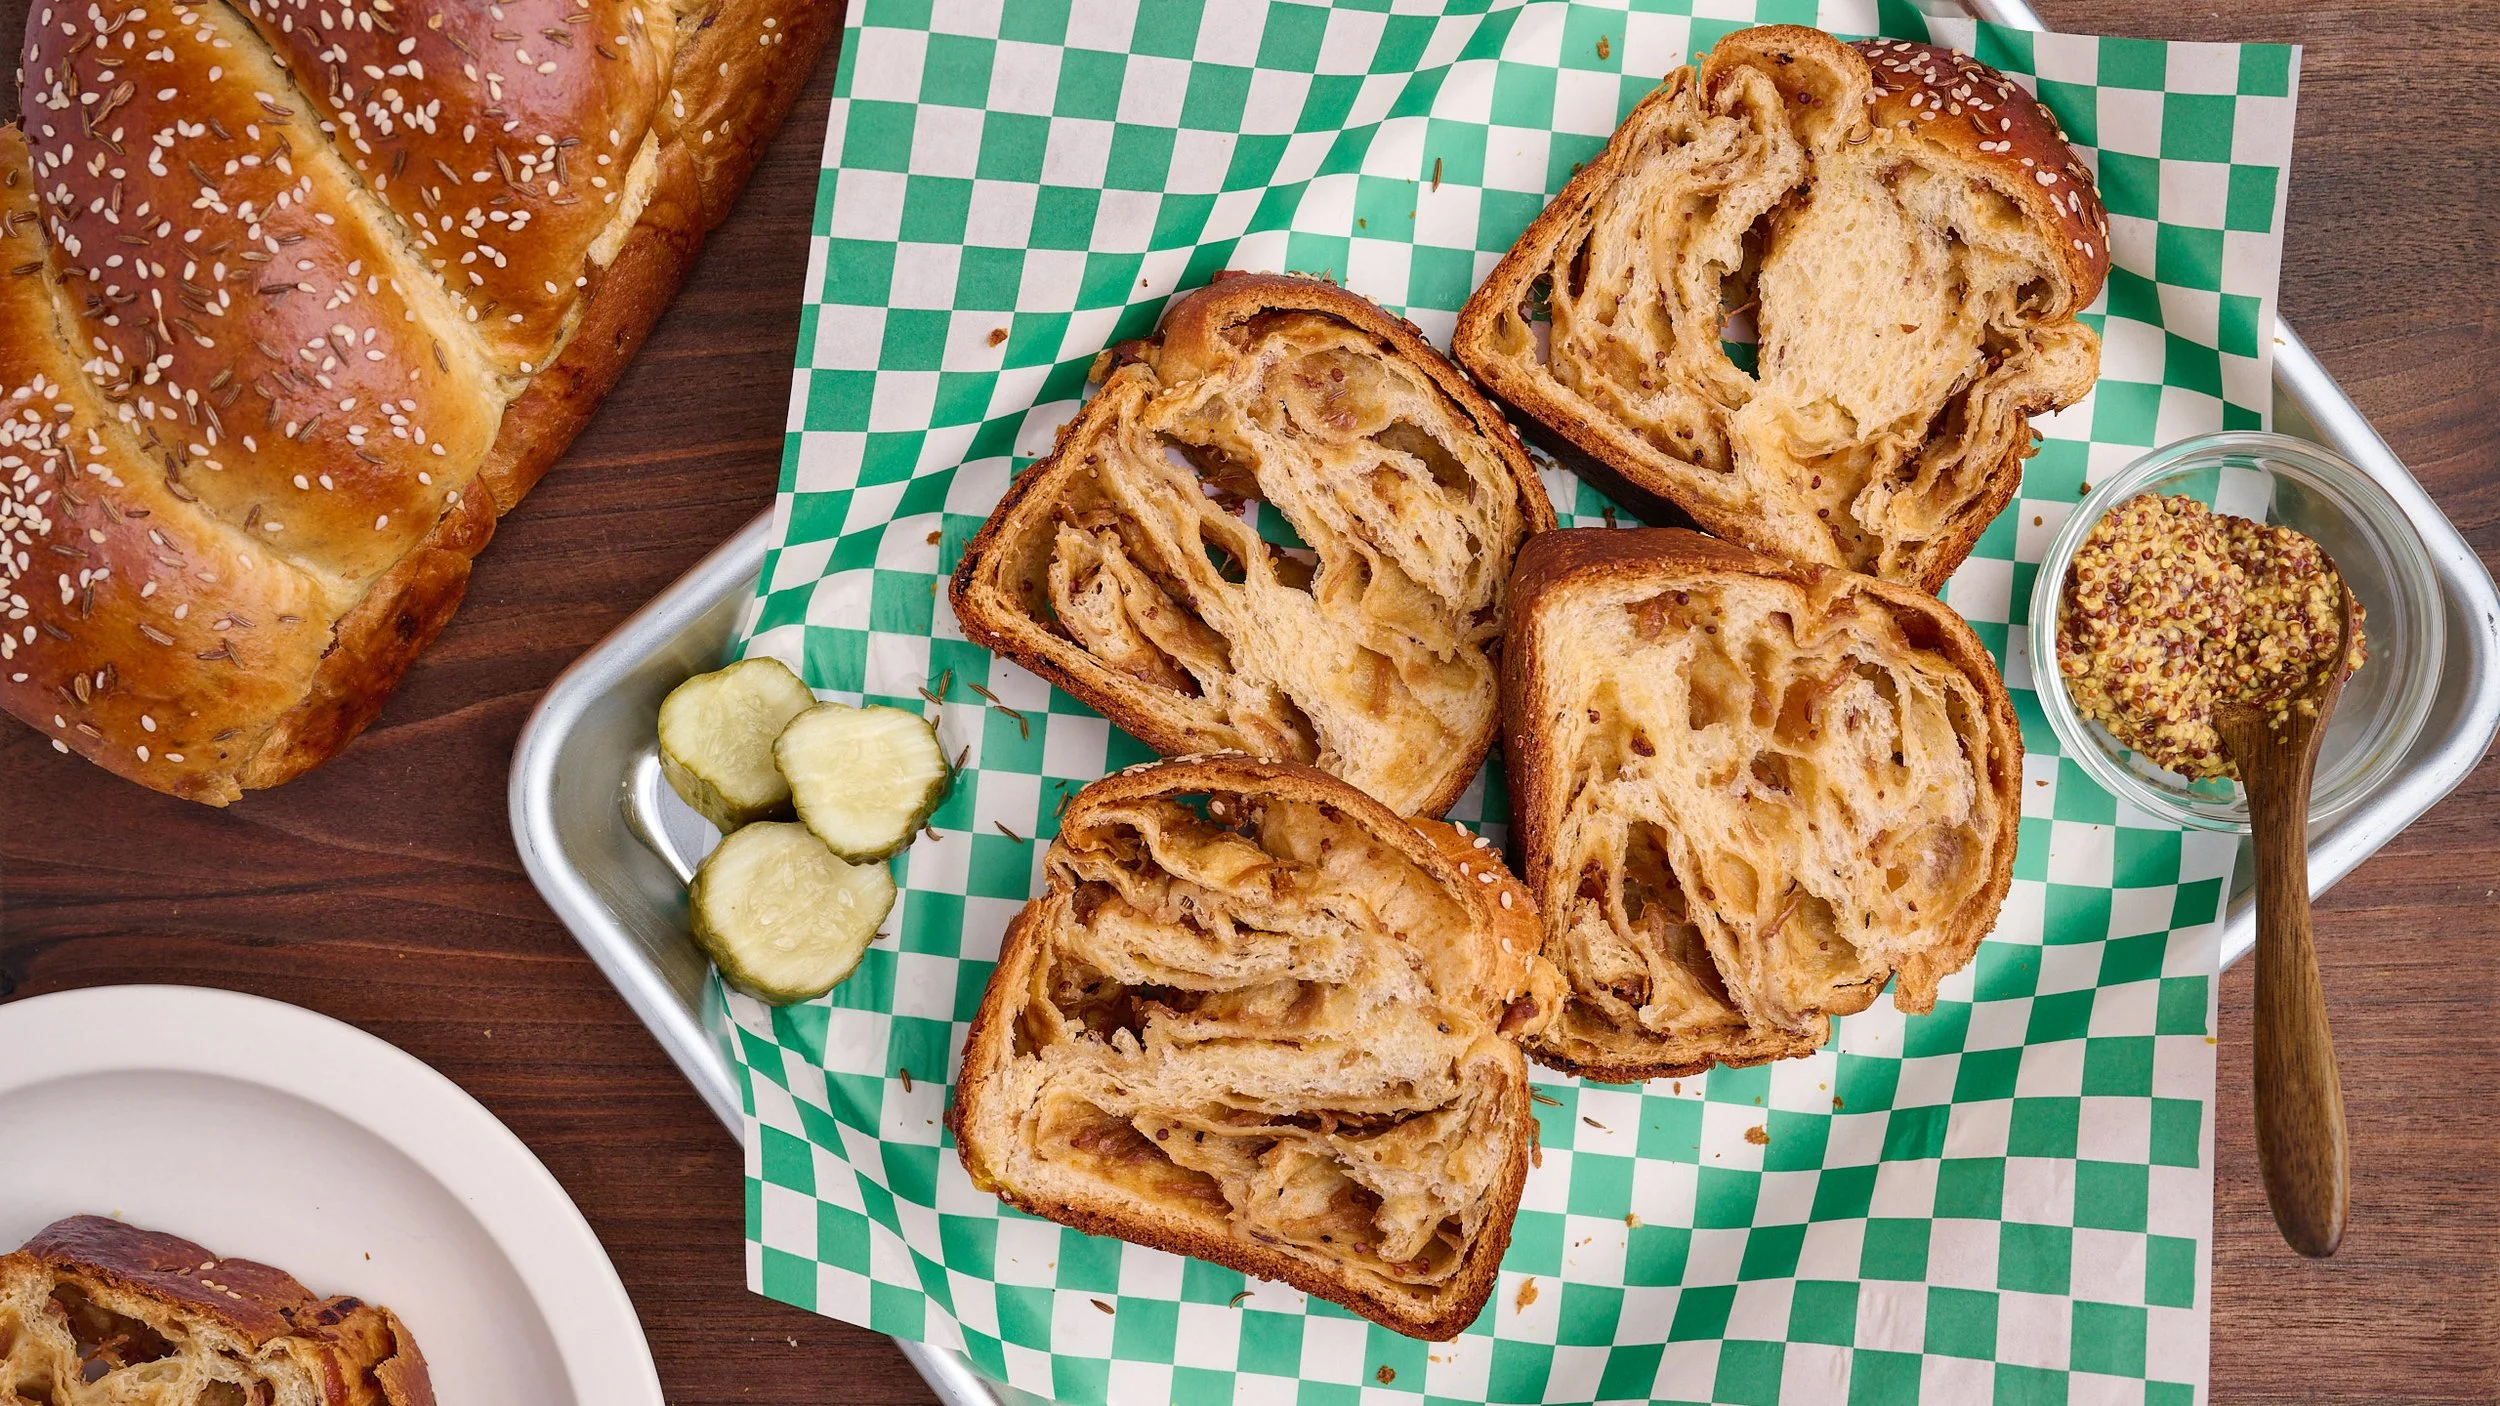
Makes 1 Nine Inch tartInspired by the flavors of a classic Jewish deli, this savory babka is made with rye dough and filled with deeply caramelized onions and whole grain mustard.
It uses the same milk bread dough as my Chocolate Babka, but this time with a bit of rye flour subbed in and toasted caraway seeds. You get that same pillowy texture, but with a punchier, savory edge. The filling is simple but deeply flavorful. For caramelizing the onions, I have you add a pinch of sugar and briefly steam them with water — two easy tricks that speed up the process. The onions are then tossed with whole grain mustard, bringing some heat and tang that pairs perfectly with the rye and caraway.
Instead of the traditional babka shaping where you slice the log down the middle to expose the swirl, this version uses an alternative twist. The log is kept intact and twisted together, giving the loaf a smooth top and a more structured rise.
It’s delicious on its own, but toasted and piled high with pastrami or turned into a Reuben…it’s next-level.
Note: If your stand mixer is larger than a standard 4.5–5 quart, I recommend doubling the recipe. A single batch may be too small to knead effectively in a large bowl.
WHAT YOU’LL NEED
-
![loaf pan best metal loaf pan loaf cake pan quick bread pan amazon]()
8.5 x 4.5" Loaf Pan
-
![Saucepan on amazon best chocolate rolls recipe best chocolate rolls]()
Saucepan
-
![Oxo Stainless Steel Eleven Inch Whisk on Amazon best stainless steel whisk best kitchen whisk]()
Whisk
-
![Kitchen Aid Five Quart Stand Mixer in Matte Black Finish on Amazon]()
Stand Mixer
-
![Oxo good grips everyday spatula on amazon best silicone spatula best rubber spatula for cooking]()
Spatula
-
![Best rolling pin amazon best french rolling pins rolling pin for sale best rolling pin]()
Rolling Pin
-
![Escali Digital Food Scale in Chrome Color on Amazon]()
Digital Kitchen Scale


INGREDIENTS
Tart Dough
9 tbsp unsalted butter, room temp (128 g)
⅓ cup powdered sugar (45 g)
1 tsp Diamond Crystal kosher salt (or ½ tsp Morton)
3 large egg yolks
1 tbsp cold water
1 ½ cups + 2 tbsp all-purpose flour (225 g)
For egg wash: 1 egg whisked with a splash of water
Salted Peanut Butter Caramel
1 cup granulated sugar (200 g)
2 tbsp light corn syrup (30 g)
¼ cup water (60 g)
¾ cup heavy cream, warmed (180 g)
4 tbsp unsalted butter (57 g)
½ cup smooth peanut butter (125 g)
¾ Diamond Crystal kosher salt
(or ½ tsp Morton)1 tsp vanilla extract
½ cup roasted salted peanuts, finely chopped (70 g)
Topping
Egg wash: 1 egg whisked with a splash of water
Extra caraway seeds
Sesame seeds (optional)
DIRECTIONS
Make the Tart Dough
In a stand mixer fitted with the paddle attachment, cream together the butter, powdered sugar, and salt just until smooth. Do not whip airy.
Add the egg yolks and water and mix until smooth.
Add the flour and mix on low until the dough comes together in crumbles.
Turn out onto worksurface and finish pressing together by hand into a smooth, cohesive dough. Press into a flat disc, wrap tightly in plastic wrap, and chill for 30-60 minutes.
Place between two big sheets of parchment paper (or two silicone baking mats) and roll to a very thin circle, about 2.5–3 mm thick (you roll between parchment so you don’t need to use bench flour, which dries out the dough and leads to cracking). If the dough is too firm to roll straight out of the fridge, let it sit for about 15 minutes at room temperature.
Peel off the parchment, careful not to tear the dough, and transfer to a 9 inch tart pan or perforated tart ring. If using a ring, set on a baking sheet with a silcone baking mat underneath (or parchment if you don’t have that).
Press into the tart pan, ensuring it’s even around all sides, then trim off the excess scraps, leaving some overhang around the edges of the pan to prevent shrinking in the oven.
Dock across the bottom surface all over with a fork, then freeze the crust for about 30 minutes.
Preheat oven to 350°F (175°C).
Set the chilled crust on a sheet tray, place on a sheet of parchment and fill with baking weights, dried beans, rice etc, to the rim.
Bake for 25 minutes with the weights, then remove.
Using a sharp knife, carefully cut the excess dough off around the rim, leaving a even border. Then brush the bottom and inside sides of the tart dough with egg wash and bake again, 15-20 minutes more until deep golden and fully dry.
Set aside to cool.
Make the Caramel & Chill
In a small bowl, mix together the sugar, corn syrup and water. Then pour into the center of a small saucepan and place over medium heat.
Note: I recommend mixing the sugar mixture in a separate bowl, then pouring into a saucepan because mixing in the pan itself usually results in sugar granules sticking to the sides, which is what often causes crystallization of caramel.
Once all sugar has melted, you can slightly increase the heat and swirl the pan once it starts changing in color for even cooking? idk how to say this.
Cook until it reaches a deep amber color, don’t be scared of color, that’s what gives it it’s flavor!
Remove from heat and gradually add in the warmed cream, whisking continuously until smooth. Please note that this will bubble up, so don’t add the cream all at once.
Whisk in the butter until fully melted.
Whisk in the peanut butter, salt, and vanilla.
Fold in the chopped peanuts.
Pour into your tart shell until you reach about halfway up the sides. You will have leftover caramel that can be saved in the fridge for HOW LONG? Spread evenly (or give it a shimmy to spread evenly).
Please note: If the dough hook struggles to incorporate the butter (common with smaller batches or rye dough), switch temporarily to the paddle attachment to fully emulsify the butter. Once incorporated, switch back to the dough hook for the final knead.
Shape the dough into a ball and place in a lightly greased medium bowl. Cover with plastic wrap. Then, choose one of the following rise options:
Same-Day (Faster): Let dough rise at room temperature for 1½ to 2 hours, until slightly puffy. Turn dough out and press into a flat rectangle. Wrap tightly in plastic wrap and freeze for about 30 minutes, until firm and well chilled (not frozen solid).
Note: Do not freeze much longer than 30 minutes — if you’re not ready to roll yet, transfer the dough to the refrigerator instead to prevent it from freezing through.
Overnight (Preferred): Let dough rest (covered) at room temperature for 1 hour to kickstart fermentation. Then turn out the dough, press into a flat rectangle, wrap tightly in plastic wrap, and refrigerate overnight (8–24 hours).
Tip: Shaping into a clean rectangle here makes rolling later much easier.
Make the Onion Filling
Melt butter in a large skillet or Dutch oven over medium heat.
Stir in the onions, salt, and a pinch of sugar. Top with ½ cup water and cover for about 10 minutes.
Remove the lid and continue cooking 20–30 minutes, stirring frequently and adding small splashes of water as needed to deglaze. Cook until deeply golden brown and jammy, with no visible liquid remaining.
Measure out ¾ cup of the onions, mix with the mustard, and set aside to cool to room temp. Save any remaining onions for other use.
Shape & Second Rise
Line and grease an 8.5 x 4.5″ loaf pan with parchment paper, leaving a bit of overhang on the long sides for easy removal after baking.
On a lightly floured surface, roll the chilled dough to about 10 x 20 inches (long side facing you).
Spread the cooled onions evenly in a thin layer, leaving a small border on each side.
Roll up tightly from the long, 20-inch side, gently pulling the dough toward you as you roll to eliminate air pockets. Flip the log seam-side up and firmly pinch the seam closed along the entire length to fully seal.
Gently roll the log back and forth to even the thickness and slightly lengthen. Trim the ends for a clean finish.
Cut the log in half, dividing into two equal pieces.
Place the two logs side by side and twist them together 3–4 times, pinching the ends to seal and twisting in opposite directions to tighten.
Place into the prepared loaf pan and gently press down to settle the loaf evenly into the pan.
Cover and let rise in a warm spot for 1.5–2 hours, until puffy.
Tip: Take a before/after photo to help gauge rise.
Once risen, brush with egg wash on all exposed surfaces and top with a sprinkle of sesame and caraway seeds.
Bake
Preheat oven to 350°F (175°C).
Bake for 50–55 minutes, placing the pan on a baking sheet. Tent with foil after 25–30 minutes to prevent over-browning. Internal temp should read 195–200°F (90–93°C).
Let cool for at least 1 hour before slicing to allow the crumb to fully set.
Wrap tightly once cooled and keep 2–3 days at room temp, or freeze for longer storage.
RECIPE NOTES & TIPS
The rise time can vary based on the temperature of the dough and the room. If you have a cool kitchen, the rise may take longer than the times in the recipe. Go by how the dough looks, it should be puffy and airy, rather than just the clock.
If you prefer traditional babka shaping with the exposed swirl, you absolutely can. Follow the shaping process outlined in the Chocolate Babka recipe instead, slicing the log lengthwise and twisting with the cut sides facing up.
Because this filling is onion-based (rather than a thick sugar paste like chocolate or cinnamon), you may notice slightly more gaps in the swirl. That’s normal. Fully caramelizing the onions to reduce excess moisture, rolling the dough tightly, sealing the seam well, and avoiding overproofing will help minimize larger air pockets.
The babka will firm up slightly overnight as it cools. Wrap it tightly once fully cool and reheat slices gently to restore softness.
To be precise and consistent when baking, I recommend using a Digital Food Scale. The one I linked is relatively inexpensive and in my opinion, a great investment for any home kitchen! But if you don’t have one, I’ll always include cup measurements as well.